
Expanding a living space is one of the most significant investments a homeowner can make in their property. A well-planned home expansion adds vital square footage, enhances day-to-day functionality, and boosts long-term resale value. However, managing a construction project of this magnitude requires careful preparation, clear communication, and precise execution. From the initial layout sketches to the final coat of paint, every step must be approached with strategy and foresight to keep timeline delays and unexpected costs at a minimum.
Navigating the complex world of permits, structural engineering, architectural styling, and tradespeople can feel overwhelming without a structured approach. This ultimate guide breaks down the home expansion journey into distinct, manageable phases, providing actionable advice for every step of the process.
Phase 1: Conceptualization and Budget Planning

Defining Functional Requirements
Before hiring professionals or breaking ground, establish exactly how the new space will serve your household. Clearly define whether the extra footprint will host a growing family, accommodate aging parents, or provide a dedicated workspace. Focus on how traffic will flow between the original structure and the new square footage to ensure the floor plan feels unified rather than tacked on. Consider long-term accessibility, natural lighting, and storage needs during this initial brainstorming period. Evaluating everyday living habits helps prevent functional bottlenecks, ensuring that every square foot added serves a clear purpose while enhancing overall household comfort.
Establishing a Realistic Budget Strategy
Financial miscalculations can derail an expansion before construction even begins. Establish a comprehensive line-item budget that includes design fees, permitting costs, site preparation, materials, labor, and a dedicated contingency fund. Setting aside fifteen to twenty percent of the overall budget for unforeseen structural issues or material price fluctuations guarantees that your project stays on track even when unexpected obstacles arise behind existing walls. Tracking expenses in a centralized ledger allows you to make informed decisions when balancing custom material upgrades against core structural costs throughout the build.
Selecting Professional Partners
Choosing the right project leaders is critical to translating your vision into a structural reality. Interview home additions specialists who carry verifiable credentials, comprehensive liability coverage, and solid references from past clients. Look for professionals who specialize in matching new exterior lines with existing architectural styles. Securing experienced home addition builders ensures that your structural design complies with localized municipal building codes, setback limitations, and lot coverage restrictions from day one. Taking the time to check past client reviews and visit completed job sites provides invaluable insight into a team’s craftsmanship and communication style.
Phase 2: Design Integration and Architectural Synergy

Harmonizing Architectural Styles
A successful expansion looks like it was part of the original architectural design. Pay close attention to rooflines, exterior siding materials, window casing styles, and foundation elevations. When adding square footage, matching exterior details prevents the visual disjointedness that plagues poorly planned residential expansions. Custom trim profiles, matching brick dye lots, and aligned exterior siding laps maintain continuity, ensuring the original residence and new footprint form a cohesive exterior envelope.
Maximizing Interior Flow and Layouts
Inside the home, transition zones dictate how comfortably the old space connects to the new expansion. Widening entry doorways, aligning ceiling heights, and matching flooring materials throughout transition points create an unbroken floor plan. Bringing in professional interior design services early in the blueprint phase helps optimize space planning, lighting placements, and cohesive finish selections, ensuring that both aesthetics and daily function are seamlessly addressed across the entire property. Careful spatial planning prevents awkward dead space and keeps furniture layouts feeling natural across interconnected living areas.
Enhancing Structural Heating and Cooling
Expanding your physical footprint increases the total volume of air that needs temperature regulation. Integrating modern HVAC services ensures that your existing mechanical systems are properly evaluated to determine if they can handle the additional load or if a dedicated multi-zone mini-split system is necessary. Upgrading ductwork routes and airflow returns during the framing phase prevents hot or cold spots in the new quarters down the road. Proper load calculations protect equipment from premature wear while keeping monthly utility bills predictable year-round.
Phase 3: Permitting, Site Preparation, and Framing
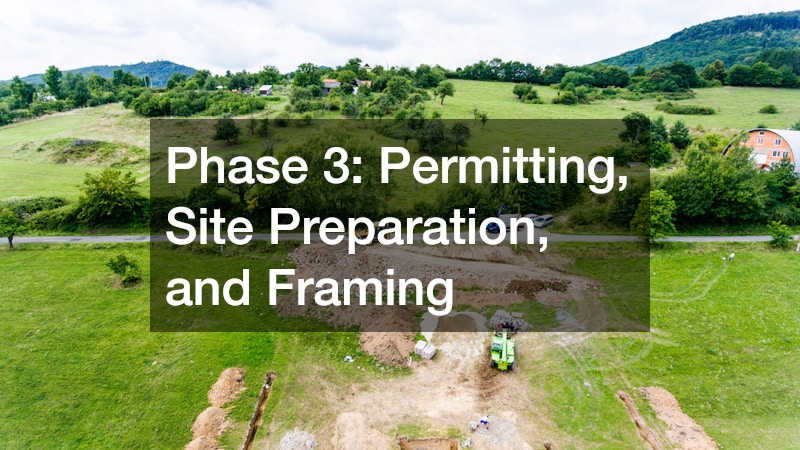
Securing Local Permits and Approvals
Building permits are non-negotiable legal protections that ensure structural integrity, electrical safety, and zoning compliance. Submit detailed architectural blueprints to your local municipal building department well in advance of your targeted ground-break date. Addressing setback limits, drainage requirements, and height restrictions before ordering materials prevents costly structural tear-downs or stop-work orders later in the timeline. Keeping digital and physical copies of approved permit documents on site allows municipal inspectors to verify compliance at each major construction milestone quickly.
Managing Groundwork and Foundation Pours
The durability of any residential extension depends entirely on the stability of its foundation. Ensure the site is excavated properly, graded for optimal water drainage away from the property, and poured according to structural engineering specifications. Whether choosing a continuous stem wall, slab-on-grade, or full basement expansion, proper curing time must be strictly observed before any heavy wood framing begins on top. Installing perimeter drainage lines and high-performance damp-proofing membranes safeguards foundation walls against moisture intrusion and settlement cracks.
Overseeing Exterior Shell Construction
Once the foundation cures, framing brings the geometric shape of the space into view. Walls, floor joists, and ceiling trusses must be constructed with precise tolerances to prevent uneven floors or sagging ceilings. Protecting the exposed framing from rain and moisture during this phase is vital to prevent wood warping and mold issues before subflooring and exterior sheathing are fastened down. Utilizing engineered lumber for long structural spans creates open floor concepts without requiring intrusive load-bearing interior support columns.
Phase 4: Enclosure and Systems Installation

Weatherproofing through Structural Upgrades
Closing in the structural shell requires installing sub-roofing, flashing, and exterior weather barriers to keep precipitation out of the exposed framing. Executing a complete roof replacement or seamless roof tie-in ensures that the intersection between old and new rafters remains entirely watertight. Proper ice and water shield installation alongside proper ridge ventilation protects the internal timber framing from severe weather for decades to come. Sealing wall sheathing seams with high-performance weatherization tape blocks exterior drafts while allowing interior moisture vapor to escape efficiently.
Roughing In Electrical, Plumbing, and Gas
With the exterior shell sealed against the elements, mechanical trades step in to run utility infrastructure inside the open wall cavities. Electricians, plumbers, and pipefitters run wiring bundles, drain-waste-vent lines, supply lines, and gas conduits throughout the framework. Careful mapping of electrical outlets, lighting switches, and structural plumbing stacks guarantees that future fixture installations align perfectly with your daily routine. Documenting hidden utility runs with photography prior to insulation installation provides an invaluable historical record for future repairs or maintenance.
Modernizing Living Room Focal Points
If your expanded footprint includes a new or upgraded living room or den, integrating smart home infrastructure or modern heating elements elevates the room’s comfort level significantly. Executing modern fireplace conversions during the rough-in stage allows technicians to run required gas lines, electrical circuits, or direct-vent chimney flues before drywall goes up. Converting an outdated masonry fireplace into a sleek gas or electric insert creates a clean focal point that offers efficient zonal heating for the new space. Built-in shelving niches around the hearth can also be framed out at this point to maximize storage and visual depth.
Phase 5: Interior Finishes and Speciality Remodeling
Transforming High-Traffic Bathrooms
Bathrooms added or expanded within the new footprint require intense attention to moisture management and layout ergonomics. Utilizing specialized bathroom remodeling services guarantees that waterproofing membranes, shower pans, tile backer boards, and plumbing fixtures are installed according to strict industry standards. Proper exhaust fan ventilation and water-resistant materials protect your investment from hidden humidity damage over time. Adding radiant floor heating mats beneath porcelain floor tiles introduces luxury comfort while helping dry excess moisture quickly.
Designing Functional Culinary Spaces
If the expansion centers on expanding an existing culinary layout or adding a secondary prep space, layout efficiency is essential. Executing a successful kitchen remodeling project inside the expanded zone involves coordinating cabinet installations, heavy countertop fittings, and dedicated electrical circuits for heavy appliances. Establishing an ergonomic work triangle between the sink, refrigerator, and cooking surfaces maximizes usability in your newly acquired square footage. Incorporating deep pantry drawers and dedicated task lighting above prep areas ensures that the space works effortlessly during peak meal prep hours.
Selecting Durable Interior Surfaces
Drywall hanging, taping, sanding, and priming turn an open timber shell into warm living spaces. Choose durable paint finishes, high-traffic flooring options, and robust trim profiles that match the rest of the residence. Pay close attention to surface prep, as proper priming on fresh drywall panels guarantees a flawless final coat that reflects natural light beautifully across the room. Installing resilient baseboards and door casings masks structural expansion joints while shielding wall corners from daily foot traffic and furniture impacts.
Phase 6: Exterior Integration and Final Detailing
Coordinating General Contractors and Trades
As the build nears completion, scheduling overlapping sub-contractors demands organized site management. Utilizing seasoned general contractors streamlines the final sequence of trades, ensuring painters, trim carpenters, flooring installers, and electricians finish their work without damaging previous installations. Clear oversight during this multi-trade phase keeps the final punch list concise and achievable. Maintaining daily communication logs prevents scheduling conflicts and ensures specialized tradespeople have full access to necessary work zones.
Upgrading Garage and Access Structures
An expansion often affects attached structural spaces like carports, storage bays, or access overhead doors. Hiring reputable garage door repair companies or installation specialists guarantees that attached utility spaces remain insulated, secure, and properly aligned. Upgrading track hardware, high-tension springs, and automatic openers ensures smooth, safe operation where the new living structure meets existing utility zones. Weather-stripping perimeter joints keeps dust, pest intrusion, and extreme outdoor air temperatures from infiltrating neighboring living quarters.
Conducting Punch List Inspections
Before final payment sign-offs occur, walk through every square foot of the expansion with your main project supervisor. Test every light switch, window sash, plumbing valve, and door latch to ensure full functionality. Documenting minor cosmetic paint touch-ups or caulk gaps on a clear punch list guarantees that every detail meets your standards before the crew departs. Taking time to review equipment warranties and operational manuals during this final walkthrough gives you full control over your newly installed household mechanicals.
Phase 7: Post-Construction and Space Optimization
Cleaning and Decontamination
Construction dust penetrates every corner of a home if left unchecked during a major build. Hire a professional deep-cleaning crew experienced in post-construction remediation to scrub air ducts, wash interior glass, and vacuum fine drywall dust from floorboards. Cleaning air registers and replacing return filters ensures that your indoor air quality remains healthy from day one of occupancy. Sanitizing non-porous surface materials and wiping down interior cabinetry interiors leaves the newly constructed environment completely spotless for your family.
Furnishing and Decorating
With the structure clean and fully signed off by local inspectors, bring in your furnishings and decor to personalize the space. Position furniture to complement natural light sources and maintain open pathways into the main house. Layered lighting, including ambient overhead fixtures, focused task lights, and subtle accent lamps, highlights architectural features and makes the newly added square footage feel welcoming. Incorporating area rugs and textured window treatments softens acoustic echoes inherent in newly built, open-concept spaces.
Maintaining Structural Upgrades
Protect your investment by establishing a routine maintenance schedule for all newly installed systems and exterior finishes. Inspect roof valleys, clean gutters, replace air filters regularly, and monitor exterior caulk joints seasonally. Proactive maintenance preserves the structural integrity and aesthetic beauty of your newly expanded home for decades to come. Keeping detailed records of maintenance dates and contractor contacts ensures that future upkeep remains organized and simple throughout the lifespan of your property investment.
Planning and executing a home expansion is a multifaceted journey that rewards patience, careful preparation, and expert craftsmanship. By breaking down the complex construction timeline into clear, sequential phases, you can navigate design choices, trade management, and structural integrations with absolute confidence. From initial budget allocations and zoning approvals down to the final interior finishes, every decision contributes to a cohesive, comfortable space that enriches your daily life. With the right strategies and trusted professionals supporting your vision, your residential expansion will seamlessly bridge the gap between present living needs and long-term property value.