A home earns its keep by doing three things well. It shelters the people inside from wind, rain, heat, and cold. It delivers steady comfort, with reliable water, clean air, and consistent temperatures in every room. And it offers spaces that hold up to real life, from a workshop floor that shrugs off spilled oil to a backyard retreat that stays sound for decades. Meeting those goals depends less on any single feature and more on how well every system and surface is planned, built, and maintained over time.
Weak links show up in predictable ways. Insects and animals exploit gaps around utilities and eaves, leaning limbs threaten shingles during storms, and hidden leaks soften framing and subfloors long before stains appear. Dirty blower wheels and low refrigerant chip away at comfort and efficiency, while clogged drainage channels and worn flashing let water into the structure. Bare concrete cracks and stains, and poorly engineered outdoor features shift and leak. Strong shelter, steady comfort, and spaces built to last come from addressing each of these weak points with skilled workmanship and a steady routine of care.
Mapping Activity Hotspots and Scheduling Quarterly Perimeter Treatments

Insects and rodents rarely spread evenly through a property. Activity concentrates in hotspots where moisture, food, and shelter come together, such as crawlspaces, utility rooms, cooking areas, mulch beds against the foundation, and gaps around pipes and wires. Treating the entire house the same way wastes product and misses the true sources, while sporadic treatments allow populations to rebound between visits, leading to recurring infestations and damage.
Year-round pest control begins with a thorough inspection that maps activity hotspots using sticky monitors, flashlights, and moisture meters, recording conducive conditions such as leaks, clutter, and vegetation contact. Entry points are sealed with copper mesh, sealant, and hardware cloth, and targeted baits are placed where activity is highest. Quarterly perimeter treatments apply granular and liquid products around the foundation, eaves, and entry points, timed to intercept seasonal invaders, while monitors are checked and recorded at each visit to track progress and adjust the plan.
Assessing Hazardous Leans and Grinding Leftover Stumps
A lean is not always dangerous, as many specimens grow at an angle for decades without problems. A new or increasing lean, however, often signals root failure, especially after storms or construction activity. Cracks in the soil on the side opposite the lean, exposed roots, and heaving ground are warning signs that the root plate is lifting. When a leaning specimen fails, it can crush shingles, decks, vehicles, and power lines, causing serious damage and injury.
Safe tree removal begins with an assessment by an ISA Certified Arborist, who evaluates the direction and degree of lean, root plate stability, decay, and surrounding targets. Crews use climbers, aerial lifts, or cranes to dismantle the canopy in controlled sections, rigging heavy pieces with ropes and lowering devices to keep them away from structures. The trunk is sectioned or felled into a clear zone. Leftover stumps are ground six to twelve inches below grade, grindings are removed, and the area is backfilled with topsoil for replanting or seeding.
Locating Hidden Leaks and Upgrading Aging Supply Lines
Leaks inside walls, beneath floors, and above ceilings can run for months before anyone notices. Signs include unexplained increases in water bills, the sound of running water when fixtures are off, musty odors, warm spots on floors, and stained or bubbling drywall. Aging supply lines made of galvanized steel, polybutylene, or thin-walled copper are especially prone to corrosion, pinhole leaks, and sudden failure, often causing extensive damage.
Licensed plumbers begin with a static pressure test and water meter check to confirm a leak, then use acoustic listening devices, thermal imaging, and moisture meters to pinpoint the location without unnecessary demolition. Damaged sections are cut out and repaired, and aging supply lines are replaced with PEX-A or Type L copper, routed through walls and ceilings with minimal openings and properly supported. Quarter-turn shutoff valves are installed at fixtures, and a pressure-reducing valve keeps static pressure between 50 and 70 psi. Smart leak detectors placed near tanks, sinks, and laundry hookups add early warning for future problems.
Cleaning Dusty Blower Wheels and Testing Safety Controls

The blower wheel moves all the air through heating and cooling equipment, and over time it accumulates dust, pet hair, and debris on its curved blades. Even a thin layer can reduce airflow significantly, lowering efficiency, increasing energy use, and causing coils to freeze or heat exchangers to overheat. Safety controls, such as limit switches, pressure switches, and flame sensors, protect the equipment and household, but they can fail or become unreliable over time.
Seasonal HVAC Service begins with shutting off power and removing the blower assembly to clean the wheel thoroughly with brushes, degreaser, and compressed air, checking the motor bearings and balance during reassembly. Filters are replaced, and static pressure is measured to confirm proper airflow. Safety controls are tested, including high-limit switches, rollout switches, pressure switches, flame sensors, and condensate float switches. Electrical connections are tightened, capacitors are tested, and combustion is analyzed on gas equipment to verify safe, efficient operation.
Diagnosing Warm Airflow and Sealing Refrigerant Leaks
When registers blow warm or barely cool air on a hot day, the cause may be a dirty filter, a failed capacitor, a clogged condenser coil, or low refrigerant. Because cooling systems are sealed, low refrigerant always means a leak, often at brazed joints, flare fittings, Schrader valves, or corroded evaporator coils. Running with low charge forces the compressor to work harder, risking overheating and costly failure, while frozen coils can lead to water damage.
Prompt air conditioning repair begins with checking the thermostat, filter, breaker, capacitor, and contactor, then measuring refrigerant pressures, superheat, and subcooling to assess charge. When a leak is suspected, technicians use electronic leak detectors, bubble solution, or ultraviolet dye to locate it, then repair the leak by brazing under a nitrogen purge, replacing valve cores, or replacing a corroded coil. The system is pressure tested with nitrogen, evacuated to 500 microns, and recharged by weight to manufacturer specifications. Coils are cleaned and condensate lines flushed so the restored system can deliver its full rated capacity.
Replacing Wind-Torn Shingles and Rebuilding Valley Flashing
High winds can lift and tear shingles, especially along eaves, rakes, and ridges, exposing underlayment and nail holes to rain. Valleys, where two slopes meet, carry concentrated runoff and are among the most leak-prone areas on the shell. Corroded metal valley flashing, cracked woven shingles, and debris buildup can cause water to back up under shingles, leading to leaks, stained ceilings, rotted decking, and mold growth in the attic.
An experienced roofer begins with a careful inspection of shingles, flashing, valleys, and penetrations, along with an attic check for leaks and damp insulation. Wind-torn shingles are carefully removed and replaced with matching shingles, fastened with four to six nails and sealed at the tabs. Failed valleys are rebuilt by removing shingles along the valley, installing ice-and-water membrane, and adding new W-style metal valley flashing or properly woven or closed-cut shingle valleys. Nearby flashing and pipe boots are inspected and replaced as needed, and exposed fasteners are sealed to close off every likely leak point.
Clearing Clogged Downspouts and Rehanging Sagging Troughs
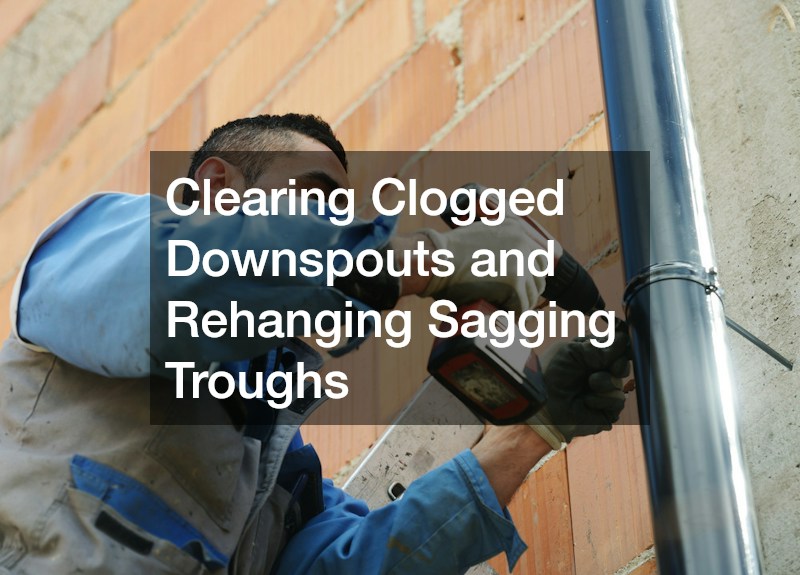
Drainage channels at the eaves carry thousands of gallons of runoff away from the house, but clogged downspouts stop that flow entirely. Leaves, seeds, shingle granules, and nests pack into elbows and outlets, causing water to back up and overflow. The added weight of standing water and debris pulls hangers loose, causing troughs to sag, pull away from the fascia, and spill water onto siding, walkways, and foundations, where it causes erosion and leaks.
Bringing each gutter back into service starts with removing debris by hand, bagging it, and flushing troughs with a hose. Clogged downspouts are cleared with a pressure nozzle or auger, and elbows are disassembled and cleaned when necessary. Sagging sections are rehung with hidden hangers spaced every 24 inches and fastened with long structural screws into rafter tails, restoring a pitch of about a quarter inch per ten feet toward outlets. Rotted fascia is replaced, seams are resealed, and extensions carry water away from the foundation.
Pouring Insulated Slabs and Framing Attached Workshops
An attached workshop or parking space can add valuable storage and hobby space, but it must be built to handle heavy loads, temperature swings, and moisture. Uninsulated slabs stay cold and damp, making the space uncomfortable and encouraging condensation that rusts tools and equipment. Framing that ties poorly into the existing structure can cause leaks at the connection, and improper fire separation between the workshop and living space creates safety hazards.
A seasoned garage contractor begins with permits, site preparation, and soil compaction, then places a gravel base, rigid foam insulation, and a vapor barrier before pouring a reinforced concrete slab with thickened edges. Walls are framed on pressure-treated sill plates with anchor bolts, and connections to the existing house are flashed and integrated with the shell and siding. Code-required fire separation, including Type X drywall on shared walls and ceilings, and a self-closing, fire-rated entry, protect the living space. Insulated walls, a dedicated subpanel, and properly sized circuits for tools and chargers make the new space comfortable and practical year-round.
Profiling Bare Concrete and Broadcasting Decorative Flakes
Bare concrete in workshops and parking areas absorbs oil, road salt, and chemicals, staining easily and generating dust as the surface wears. Cracks and spalling worsen with freeze-thaw cycles and de-icing salts. Many do-it-yourself coatings fail within months because they are applied over smooth, contaminated, or damp concrete without proper preparation, causing them to peel, bubble, and lift under hot tires.
Durable epoxy floors start with moisture testing and thorough preparation, using diamond grinders to remove contaminants and create a concrete surface profile of CSP 2 to 3 for strong adhesion. Cracks and spalls are repaired with epoxy or polyurea fillers, and a 100-percent-solids base coat is applied. While the base coat is wet, decorative vinyl flakes are broadcast to full rejection, adding texture, slip resistance, and visual appeal. Excess flakes are scraped and vacuumed, and a polyaspartic or polyurethane topcoat seals the system. The finished surface resists hot tire pickup, chemical spills, and UV yellowing, and wipes clean with a damp mop.
Engineering Sloped-Site Basins and Spraying Steel-Reinforced Shells
Sloped backyards can provide dramatic settings for swim areas, but they present significant engineering challenges. Soil on the downhill side may be unstable, and retaining walls may be needed to support the basin and deck. Without proper engineering, shells on sloped sites can settle, crack, or shift, leading to leaks and structural failure, and drainage problems can undermine the surrounding soil and hardscape.
A skilled pool builder begins with soil testing and a structural engineering review, designing deep footings, piers, or retaining walls to support the basin on sloped sites. The basin is excavated, and a grid of steel rebar is tied throughout the floor and walls, often with thicker bars and closer spacing on the downhill side. Gunite or shotcrete is sprayed to the specified thickness and cured to form a monolithic shell. Drainage behind walls relieves hydrostatic pressure, and decks are sloped away from the waterline to manage runoff. Plumbing is sized for proper turnover, and variable-speed pumps keep operating costs low.
Strong shelter, steady comfort, and spaces built to last depend on systems and structures that are carefully designed, properly installed, and regularly maintained. A sound shell and clear drainage channels keep water out, while targeted prevention keeps insects and animals away. Reliable plumbing and well-maintained heating and cooling equipment deliver comfort and efficiency every day.
Durable workshop spaces, coated concrete, and well-engineered swim areas add function and enjoyment to the property, and careful canopy management protects everything below from storm damage. Regular inspections and seasonal maintenance, such as cleaning drainage channels, servicing heating and cooling equipment, checking for leaks, and monitoring for insects, catch small problems before they become costly repairs. A simple log of service dates and findings helps owners stay ahead of each system.
The reward is a home that stands strong, feels comfortable, and holds its value for decades. With skilled workmanship, quality materials, and consistent care, homeowners can enjoy shelter, comfort, and spaces that truly last.